
How Do You Repair a Safety Net?
We are quite often asked about permanent repairs that may have been made to safety nets, the primary questions being:
- How can we be certain that the repairs have been done correctly?
- How many repairs can there be in a single safety net?
The answers can be found by considering the FASET advice contained in their various Technical Bulletins. It is worth noting that there are several ways of permanently repairing nets, but our preferred methodology is generally regarded as the most effective and robust, and that involves the use of C rings to secure the patch repair in position.
Simply, damaged knotless safety nets can be repaired to enable further use.
The following commentary is based on FASET guidance and should be followed to ensure that all repairs are carried out in a fully compliant manner.
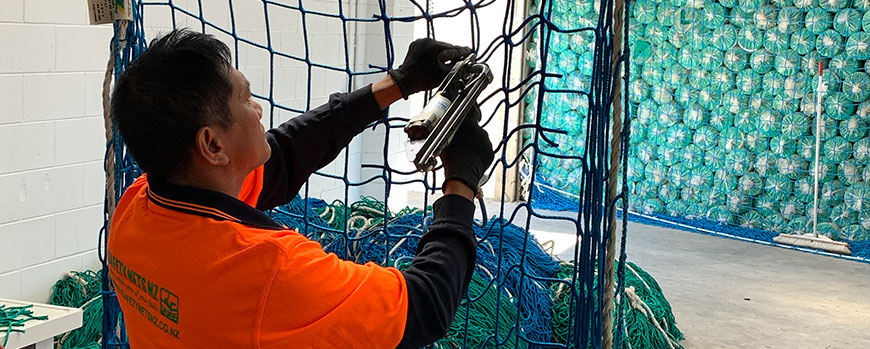
COMPETENCY OF NET REPAIRER
All repairs to a safety net must be carried out by an authorised and competent person who has attended a recognised training course within the previous five years. At Safety Nets NZ we have a fully trained and qualified rigger who is solely responsible for the management of our entire net inventory, including the permanent repair of our nets. He has a dedicated zone at our main premises in which he manages the overall compliance of our nets, ensuring that they remain fit for purpose.
PERMANENT PATCH REPAIR - MINIMUM STANDARD
- Multi-mesh cuts to a Safety Net shall only be repaired using a patch repair
- The repair shall have a minimum of 1 mesh overlap as shown below
- The patch used in a repair shall be of new material and shall comply with BS EN 1263-1
- The repair twine shall be a minimum of 3mm thick, shall be of new material which is approved by the Safety Net Manufacturer for safety net repairs and shall be double knotted either side of each strand
- There are two methods of attaching a patch to a safety net, firstly by using twine, or secondly via mechanically applied C rings
1. TWINE REPAIRS
(I) By lacing repair twine through both the inside and perimeter meshes of the patch, as follows:
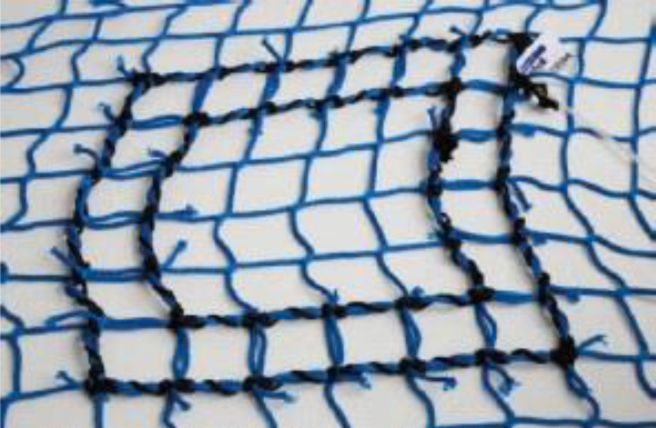
(II) By lacing repair twine through the perimeter meshes of the patch and using cable ties to attach the inside (only) mesh , see below:
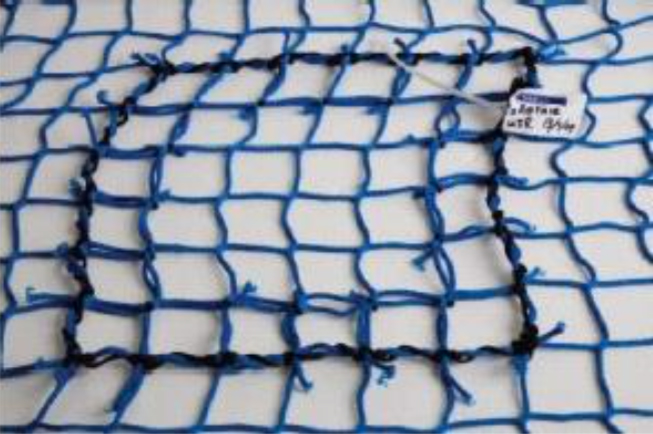
The cable tie is not to be considered as contributing any strength to the repair
- Repairs must not overlap
2. PERMANENT SINGLE STRAND REPAIR
- The repair must extend at least 1 square past the damage and the repair twine must cross the damaged hole twice
- The repair twine shall be a minimum of 3mm thick, shall be of new material which is approved by the Safety Net Manufacturer for safety net repairs and shall be double knotted either side of each strand
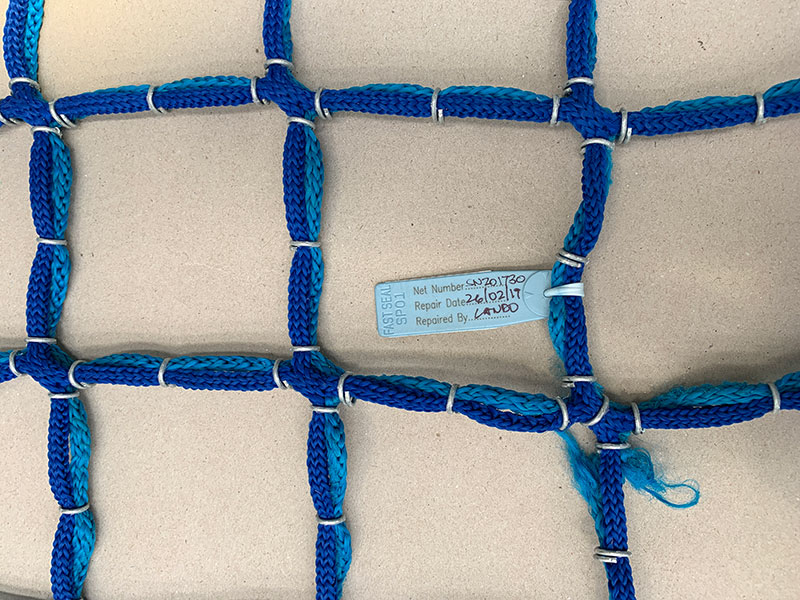
3. PERMANENT C RING PATCH REPAIR - MINIMUM STANDARD
The repairer shall only use C Rings and equipment that has been tested and proven to be fit for purpose
The repair shall have a minimum of 1 mesh overlap
The patch used in a repair shall be of new material and shall comply with BS EN 1263-1
Each full mesh shall have at least three equally spaced C rings applied to it and they shall enclose both the original net and new patch material.
FASET Technical Bulletin No.5 confirms that there is no limit to the number of permanent repairs that can be made to a safety net.
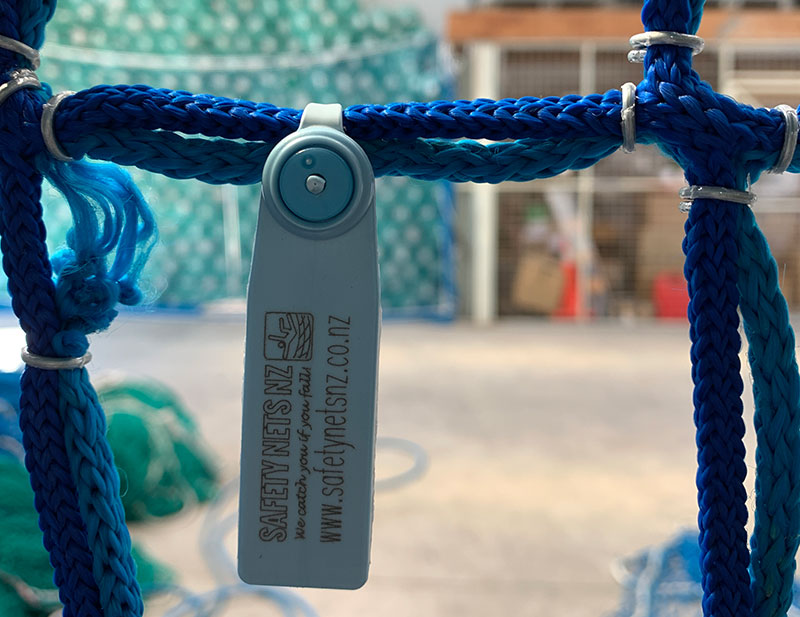
All repairs must be tagged to confirm date of repair etc… We have developed our own proprietary tags that are attached to all repairs to ensure that the appropriate details are recorded.
I hope that this helps with clarifying what to look for when you are assessing the quality, and compliance of any repairs that you encounter when using safety nets on your sites.
The team at Safety Nets NZ prides itself on the systems we have in place to ensure that all of our nets remain compliant, and the correct and effective repair of nets is fundamental to ensuring that any repaired nets remain fit for purpose.
Until next time
Craig
February
18 2019
18 2019